Friday 29 January 2010

Gladstone and RC update

Firstly the Gladstone:

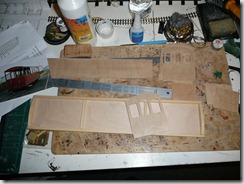
- The rest of the seat sides have been put together and stored ready for the slats to be added.

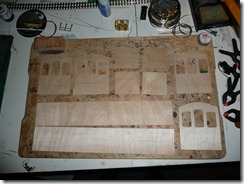
- The internal partitions have had their windows filed square (they were cut out with curved edges!

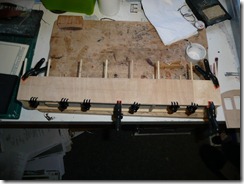
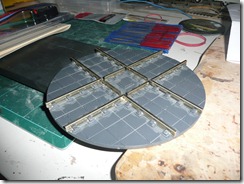
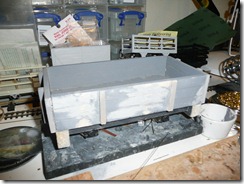
- The sides and ends have been glued together to form a box as below and clamped with anything I could find whilst they glued.

P1080504 

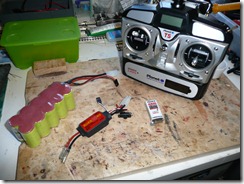
Also some good news on radio control.  Having given up on the viper, I decided to pick up a cheap (and smaller) unit on ebay.  It works!!

My chosen system is a 2.4Ghz transmitter and receiver from planet 5, a 12v 3300mAh battery pack and this ebay ESC. 

P1080503

Tuesday 26 January 2010

Carriage works update

Work is continuing on the Gladstone...
  • 6 seat frames have been constructed and slats will be added once the joints are dry.
  • The internal partitions have been sandwiched together ready
  • The ends have had full height pillars attached
  • The sides have been joined together with pillars
  • The bogies have been assembled and 6BA bolts ordered to bolt them to the floor.  Pivot pads have been glued onto the carriage chassis.
The next stage involves gluing the sides and ends together and attaching them to the floor, so the carriage will really start to come alive (pictures promised).

Monday 25 January 2010

Scribing complete

The mind-numbingly and extraordinarily boring task of scribing hundreds of lines onto the various panels of the Gladstone carriage is complete – never again!

Why this ‘kit’ doesn’t have such things done for you is anyone’s guess but I will make sure I never buy one that needs all this scribing ever again!

P1080502

Sunday 24 January 2010

Gladstone car progress

P1080492

The IMP models Gladstone car is next on the workbench.  This was purchased off ebay recently for a good sum.

The parts needed a considerable amount of cleaning up, but once that was done the floor went together well.  The next stage is the scribing of the panelling on all sides and ends, which is a nightmare of a job.  I have done one side and added pencil marks for the other sides..every 1/8 inch!

I have decided it is one of those jobs to do a few at a time and keep coming back to it rather than waste a whole evening scribing!

Colin

Friday 22 January 2010

De Winton again

P1080491

I have now completed the De Winton to the point where spraying with a base coat of satin black would make sense.  Then I can add all the brass parts without worrying about having to mask them off for later spraying. 

Various white metal fittings have thus been added (bits that go black basically – chimney, steam pipe, reverser base etc) and the coupling pockets have been added too.  All relevant holes were drilled out of the resin castings too.

In the background (i.e. until it stops raining and I can spray the body) I have also been sorting through the various parts, drilling out, filing and generally readying everything. 

This went well until a 1.5mm drill broke halfway through drilling out the hole for the piston rod hole in the slide bar piece.  After various attempts at drilling it, punching it etc it just wouldn’t budge.  So I ended up taking a piercing saw and cutting around the offending drill bit, leaving it proud of the surface (luckily I was able to do this without causing future problems for its installation).  Then I was able to hammer it out.  phew!

Wednesday 20 January 2010

De Winton

I started work on the De Winton tonight...

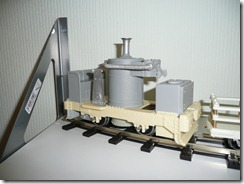
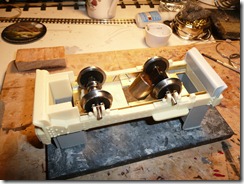
Despite being returned from Slaters, the new etched chassis and resin frames still did not match by some 1mm.  Instead of wasting more time with perhaps no more chance of a matching pair coming back from slaters, I cut the etched chassis into two and then added a small etched piece between allowing them to be spaced an extra 1mm apart. 

I then installed 2 8BA inserts into the resin and drilled enough of a hole for the screw to fit fully inside.

The copper(?) bearings were then installed and small keeper pieces of wire soldered in.  However due to the instructions not specifying which way the wheel sets should be installed, I had to redo this twice! 

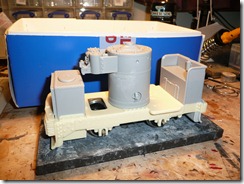
The resin bunker and tank were then glued on and the etched chassis screwed in to the resin.

I also tidied up the main boiler resin casting.

Colin

P1080490 P1080486

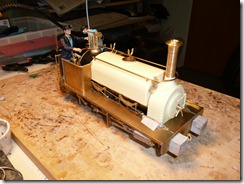
All done bar the shouting

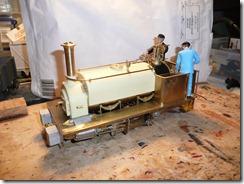
The loco is now basically complete apart from nameplates and copper piping to be added after painting.

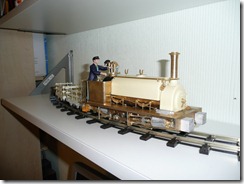
P1080483 P1080484

It has thus been moved to a new location above my PC with its two accompanying wagons.

P1080485

The final work completed included:

- Soldering up the brakes and then checking everything still worked

- Re-doing (solder instead of glue) the cab side top strips and soldering the nuts in too.

- The addition of a driver and fireman!

Colin

Tuesday 19 January 2010

It works!

Well City won 2-1 so that was good fun.

Also good fun is the fact that my loco works!  I just tested with the fly leads and everything worked perfectly.  The only issue is that after a while the 10BA steel nuts on the end of the big end crankpins wear loose and fall off.  I probably need some nut retaining compound to sort this minor issue out. 

Also added tonight were the reverser and drain cock rods, plus their cranks and the rest of the inside valve gear (although two wire runs need adding tomorrow.
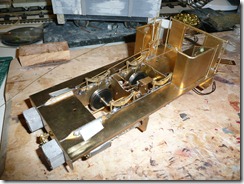
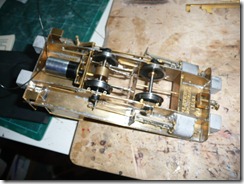
P1080479

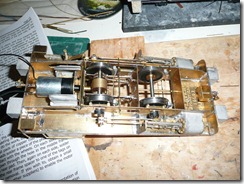
A view from underneath shows much more, and also shows the brake gear set up ready for soldering in.  I will leave this semi-removable with the gear able to hinge out of the way so that wheels can be got at.  This will also make painting easier.

The rear coupling has been reattached without its pocket, which fouled the new motor and the lower firebox white metal pieces were also glued in. 
P1080482 

Finally, I did some work on a 3 plank wagon I bought off ebay.  The sides had traces of some kind of sellotape or other glue underneath, so this has been scraped off, and filler added on top.  I kind of like the distressed look, so won’t do a perfect job on the filling.  Then a repaint and weathering await.  This may be the running wagon for the Hunslet (holding the batteries etc).
P1080480

Colin

Moving forward again

P1080477

This is where I got up to last night:

Firstly, the inside valve gear was added, which was easier once the rear wheels had been removed to go back to slaters.

The new wheelset was dropped back into the frames and the cranks were reattached. 

Then two fly leads were attached to the motor terminals for testing purposes and the motor installed.  Unfortunately the new motor fouls the rear coupling pocket, so this was removed and will need to be altered. 

I then ran out of time but hope to complete the reassembly of the valve gear tonight (after the city match obviously) and then test the beastie.

Colin

Monday 18 January 2010

Some progress

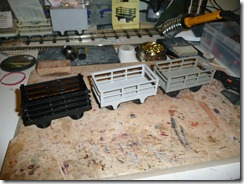
In the last few days I have completed the building of 2 more FR slate wagons and purchased another off ebay (shown below in a darker grey). 

I also completed the assembly of a peco wagon turntable, which involved adding the chairs individually and hence took some time.

P1080458 P1080459

Thursday 14 January 2010

Back from Malta

Back safe from Malta to a host of parcels including:
  • A few new pieces of track to help with designing the layout of the track - two set curves, a left hand point, a few more straights, some rail joiners and a wagon turntable.
  • The return of the rear axle of the Quarry Hunslet with the correct gearbox linkage.
  • The return of the De Winton chassis with a new resin casting that fits the etched brass inlay properly.
  • A book on garden railways for essential research
  • More powerbond superglue - my glue of choice for many applications
  • A slaters FR 2 ton wagon kit - coopercraft.
  • A driver and fireman from bachmann scenecraft which look like they will work with the Hunslet rather nicely.
So expect progress on a few fronts in the coming weeks.
Colin

Monday 4 January 2010

Some titbits

Below are some items Father Christmas brought - some real rust, well a test piece of brass rusted up, a 16mm scale bucket (soon to be rusted) and an accucraft chopper coupling.


Also seen at Christmas was Dad's Prince kit, coming along nicely...


I've had some fun with the ESC and the viper eco 20 has gone back to mtroniks for diagnosis - it works but in the forwards direction the motor struggles to start, very odd.  However the transmitter, receiver, battery and charger all work fine. 

The rear axle of the Quarry Hunslet has been removed and sent to Slaters for a new gearbox to be fitted which will mate with the new 2030 motor.  Apparently they had not done one of these motor upgrades for a while and had forgotten that the gearbox needed changing too!

I'm off to warmer climes for a while, so updates will not appera until at least the 18th Jan.

Colin