This blog is now closed to new posts, please visit my new
wordpress based site at:
http://narrowgaugemodels.com/
Saturday, 4 February 2012


Saturday, 22 October 2011
Jones the steam
Today my son and I started building a fun garden kit - a locolines Ivor the engine model.
The first stage was to seal the non waterproof parts with varnish. These were sprayed outside with plasticote.
More soon on this project.
Friday, 21 October 2011
ESC innovation
http://www.mtroniks.net/details1.asp/ProductID/193/MicroViper-loco.htm
I'm hoping this beauty is the answer to my ESC reversing woes. Specially designed for model garden railway locos, it gives the same voltage in forwards and reverse! yay!
I'm hoping this beauty is the answer to my ESC reversing woes. Specially designed for model garden railway locos, it gives the same voltage in forwards and reverse! yay!
Friday, 12 August 2011
ESCs again
Not much to report, but I am looking at ESCs again. The problem was reverse running with Rough Pup. I noticed that the ESC I've got gives 20A in forward but only 12 in reverse. This appears to be the crux of the problem.
Sunday, 5 June 2011


Earthworks
The fact that our local DIY shop (focus) is closing down spurred me into action.
Firstly I have decided to use the GRS interlink system - http://www.gardenrailsystem.com/typical5.html
So I have purchased enough bricks, sand, gravel etc to complete the line.
Secondly I have started the base earthworks for the line allowing us to plant up the areas not affected by the alignment.
The shot above shows the bricks temporarily laid to show the position of the track.
Concrete will be used to ensure a good base for the bricks where the earth has been made up.

Saturday, 19 March 2011
Large scale show, Leamington
Today we attended the large scale show just off the Fosse Way near Leamington Spa.
I purchased a useful book…. http://www.amazon.co.uk/Garden-Railways-Ground-David-Pratt/dp/0955259800
and a flying bench cheap…
http://www.ipengineering.co.uk/page68.html
I’m not really expecting to run passenger trains, but this makes a useful ‘quarryman’s’ vehicle to go with the slate wagons.
Dad also purchased the zoo car:
http://www.ipengineering.co.uk/page64.html
to go with his other bugs and his Prince…which I’m sure will make visits to my garden line from time to time.
So, now I have to work out how to build the line this summer with the minimum of cost/time spent doing it….
Monday, 6 December 2010
Tuesday, 30 November 2010
duckets done
And here are the duckets added after fun and games getting them to bend and adhere once bent. A little bit of filler was required to hide a couple of areas where the plywood ended up cracking whilst I was trying to bend it! I've also ordered some sanding sealer (White) required to finish the roof. Now to source the correct grab handles...

Monday, 29 November 2010
curly!
Well much progress tonight. The overlays went on easily with superglue, the doors requiring an extra lamination. Then the central roof bars were added and the roof forming strips laid on with masking tape strips to form the curly roof. The bogies and chopper couplings (accucraft) were then added, the latter retained with 10ba nuts/bolts.
Finally, having checked photos of the real thing, I binned the truss rods in the kit (far too chunky and square section) and made some better circular section ones from wire myself.
Now I need to add kleenex tissues to the roof (yes really) and attach the duckets. This requires soaking thin plywood in hot water to shape it - ummm sounds fiddly! My practice attempt was ok but the top of the ducket has a very tight bend to form Might be easier in brass, but then I would still have to add the plywood overlay to that. Thinking cap on...!

Finally, having checked photos of the real thing, I binned the truss rods in the kit (far too chunky and square section) and made some better circular section ones from wire myself.
Now I need to add kleenex tissues to the roof (yes really) and attach the duckets. This requires soaking thin plywood in hot water to shape it - ummm sounds fiddly! My practice attempt was ok but the top of the ducket has a very tight bend to form Might be easier in brass, but then I would still have to add the plywood overlay to that. Thinking cap on...!
Sunday, 28 November 2010
brakes off...
As mentioned on my other (009) blog, I have decided to spend more of my time on garden railway things for a while. Thus there have been further earthworks in the garden, plans created for a method of tracklaying and work restarting on the de winton. Alongside this I have started work on my ip engineering kit for the fr's brake van no.1 aka the "curly roofed van".
Here is the current state of construction - sides, ends and floor all glued together and roof supports glued in (the elastic bands are to hold it all square whilst it dries). Next come the beautiful overlays all made from laser cut plywood. Very impressive.
The bogies are already complete too.

Here is the current state of construction - sides, ends and floor all glued together and roof supports glued in (the elastic bands are to hold it all square whilst it dries). Next come the beautiful overlays all made from laser cut plywood. Very impressive.
The bogies are already complete too.
Monday, 26 April 2010
Earthworks update
As you can see below, much earth has been imported to the back garden from a project in the front garden. Today I laid out a circle of track to work out how wide this earthwork would need to be to accommodate the loop back on itself. The answer is about 1.8m.


Sunday, 25 April 2010
Bogies for the Gladstone

I wanted to add the bogies (and couplings in time) to the Gladstone so it can be ready for gauging and power trials once the garden earthworks are completed. Thus with a bit of drilling, countersinking and screwing tonight we have one carriage with wheels!
Monday, 12 April 2010
16mm show - the debut of Rough Pup
Check out this video of my engine passing some of the other 100 Hunslets!
http://www.youtube.com/watch?v=QNivf5k10_M
A great time was had by all (show report coming soon) and Rough Pup performed well.
http://www.youtube.com/watch?v=QNivf5k10_M
A great time was had by all (show report coming soon) and Rough Pup performed well.
Monday, 29 March 2010
A quick waggon kit

There has been much DIY going on recently in the ‘new’ house so modelling has been difficult. Tomorrow we have a new boiler and bathroom going in so I can’t see any change in that situation. But I did manage to find 10 mins to make up this little beastie – an andel models slate slab waggon. A piece of slate will be added on top once it’s painted. Nice and simple and it runs beautifully.
Thursday, 25 March 2010
Coupled and ready to go


I have now completed the electrical and mechanical links between loco and wagon. The couplings are simple chain links and the electrical connector is of the futaba type and is relatively unobtrusive.
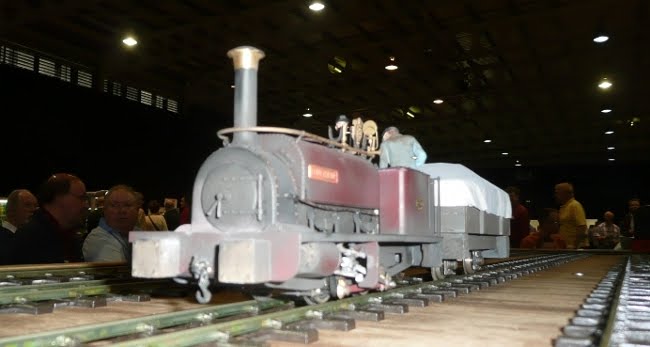
My wife says that the wagon looks like it’s got a bomb in it! This will be covered by a tarpaulin.
The only other bits that are necessary to complete before the show are to attach the nuts on the end of the big end with retaining compound as they keep working loose and to add some brasso to the slidebars to ensure they run nicely.
Friday, 12 March 2010
Done!


Just in time for the family to inspect tomorrow… The motor needs it’s electrical connector to the accompanying wagon soldering on and the wagon still needs some work, but the loco is basically complete.
I have had second thoughts on the bucket as I believe it to be a bit out of scale when comparing it with shots of a similar engine with bucket on this site http://www.penmorfa.com/Slate/Dinorwic-1967-4.htm
Nearly there


Coal in bunker, copper pipework added, nameplates on and various final detailing nearly finished.
Tuesday, 9 March 2010
A bit of progress
I'm now abroad so there will be no progress until Friday but before I went today I managed:
- To attach the main blower pipe (copper) between the smokebox side and the cab
- To cut to length 4 copper pipes to be installed on the backhead
- Added weathering powders around the smokebox door and cab floor
- Added rust dry brushed onto the filler cap and smokebox rivets
- Touched up a few areas such as the handrails
Nearly there now!
- To attach the main blower pipe (copper) between the smokebox side and the cab
- To cut to length 4 copper pipes to be installed on the backhead
- Added weathering powders around the smokebox door and cab floor
- Added rust dry brushed onto the filler cap and smokebox rivets
- Touched up a few areas such as the handrails
Nearly there now!
Monday, 8 March 2010
Reassembled

Here we are after an hour of painstaking reassembly tonight. It is incredible how a paint thickness of a few microns can cause parts to stop fitting as they did – the handrail had to be stripped back to brass to get in in and the firebox didn’t fit into the boiler without fettling too. The motion is all connected up and the motor reinstalled – not without having to resort to using superglue on a screwdriver to get the screws back in!
The handrail and brake gear cross rods are now glued in.
What remains to be done?
- Install nameplates
- Touch up areas where paint has got knocked/missed.
- Glue in driver/fireman/bunker false floor/bucket (add sand into bucket too)
- Add coal to bunker bottom hatch, rust to rivets and possibly some water stains near the filler hatch. Add weathering powders around cab floor and smokebox door.
- Reinstall rear coupling (had to be removed to get larger motor in/out)
- Install buffers on accompanying wagon at same height as loco and add couplings for that wagon (fabricated tonight ready).
- Install power coupling between loco and wagon
- Design some kind of tarpaulin for accompanying wagon (painted bacofoil?)
- Add copper pipework to loco between smokebox and cab and at bottom of gauge glasses.
- test loco and then fix 10ba nuts on big end with retainer in the thread
- Find a suitable box for storage/transport.
- Attend Stoneleigh show.
Subscribe to:
Posts (Atom)